In this tutorial, I will show you how to make a funky object in AoI that I affectionately refer to as a wallwalker. Why do I call it a wallwalker? Well, it kinda reminds me of one of those gooey rubber things you throw against the wall, and due to gravity, 'walks' down the wall. You may recall seeing something similar in this Magic Eye image I created some time ago
Click Me!.
At any rate, this is what we will create in just a few simple steps from an ordinary cube.
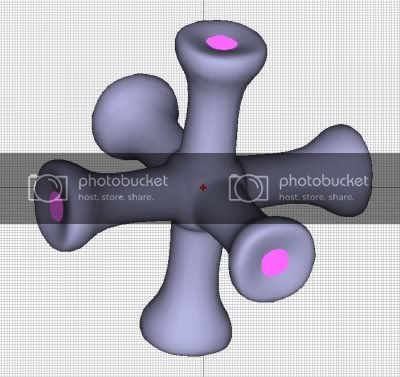
I won't be covering texturing or rendering concepts. I've discussed many of these before and there's no need to go into them again. Let's begin.
Step 1In the AoI main window, click on the Create Cube button

and while holding down the Shift Key drag out a cube in any of the views. For this exercise, it doesn't matter which window you create the cube in, just make sure to hold down the Shift Key to make it perfectly symmetrical.
Here's a screenshot of our beautiful cube:
 Step 2
We need to be able to edit the cube. In order to do that, we must convert it to a triangle mesh. In the Object List Dialog Window, right-click on the cube and select Convert to Triangle Mesh....
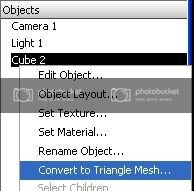
and click Ok when this dialog window appears...
 Step 3
With your mouse still in the Object List Dialog Window, double-click on the cube name to open up the Triangle Mesh Editor Window.
Make sure you have the Freehand Selection Mode activated (Edit Menu > Freehand Selection Mode or Ctrl+F) - no screenshot for this step. Also, make sure you've got the Display As Quads Option
deselected (Edit Menu > Display as Quads or Ctrl+W) - no screenshot for this step.
Step 4By default you will be in vertex mode, which is what we want. However, if you've accidently changed modes, click the 'V' key on your keyboard to go back into vertex mode. Make sure this little menu bar has the Point Mode pressed down....

Now, click the Select/Move tool

and create a loop similar to the one shown below to select the middle vertices of each face.
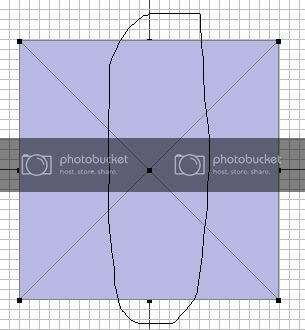
Hold down the Shift Key and make a selection as shown below to select the middle vertices on the other faces....
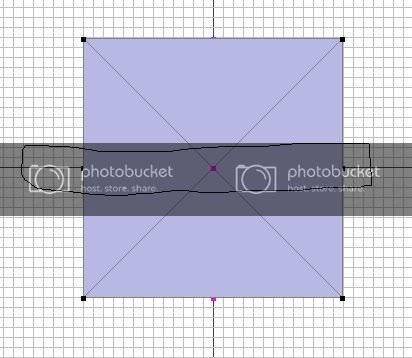
Here's a screenshot showing 3 sides faces of the cube with the middle vertices selected. All of the middle vertices on all cube faces should be selected.
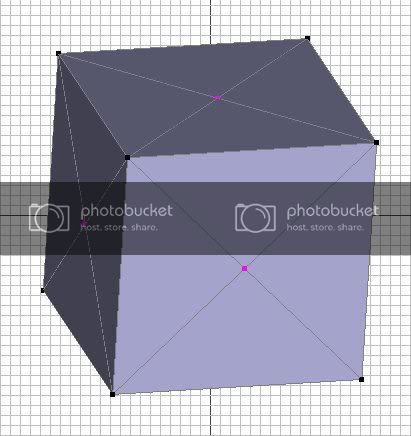
Rotate your model by clicking, holding and dragging the middle mouse button or click on the button to the left of the screen that has an eye with a looping arrow. Check to see that all of the middle vertices are selected. Deselect any that shouldn't be.
Step 5Now, we need to create an area the we can extrude the sides. Click the Bevel/Extrude tool and a little red 4-headed arrow will appear in front of your model. Hold down the Shift Key and the left mouse button and drag the 4-headed arrow to the right to resemble this:
 Step 6
Now that we have a surface to extrude, let's extrude the faces. Click the 'F' key on your keyboard. The following faces should now be selected.
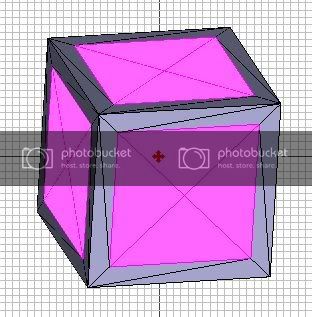
Using the Bevel/Extrude tool we used a minute ago, hold down the Shift Key and the left mouse button to keep the shape symmetrical, drag the 4-headed arrow up until your model resembles this:
 Step 7
Now, let's add a little bit of variation to the extrusion. Let go of the Shift key and with the Bevel/Extrude tool, drag the 4-headed arrow up and to the left of the screen. Your model should look something like this:
 Step 8
Hold down the Shift key one more time and drag the 4-headed arrow up the screen until you get this (This screenshot only shows one face. The whole model should look like this):
 Step 9
One last extrude....release the Shift key and with the Bevel/Extrude tool, drag the 4-headed arrow down and to the right to give the object a little indentation (This screenshot only shows one face. The whole model should look like this).
 Step 10
The model is now complete, but we need to smooth it out a bit. Go to Mesh Menu > Smoothing Method > Approximating
and you should now have this:

Click the OK button at the bottom of the Triangle Mesh Editor window to accept your changes and go back to the main AoI window where you can assign some textures/materials, lights, etc. for a nice render.
I hope you found this tutorial to be beneficial. Although it's a simple example, you'll soon learn more ways to use these operations to create more complex models.
Let me know if you have any questions.
Art