Matrix Effect Part II - Animating Your Background
In this installment, I'll show you how to animate your Matrix background in just a few simple steps. This will be the results of the tutorial:

If you missed the first part of this tutorial on how to make the Matrix background, please check out this page first:
http://www.gimpdome.com/forum/index.php?topic=3101.0In order to have a smooth animation, there must be no 'seam' where the animation transitions from the last frame back to first frame.
Fortunately, the first part of this tutorial creates a pattern that is seamless! So, we're well on our way to animating the background
already!
The most difficult part in process is determining the number of frames needed. But, guess what? It's really not that hard! Here's how I do it.
Step 1:In my image above, I created a graphic that is 110 pixels in height. I randomly decided that I wanted each frame to move 10 pixels more
than the last frame. At this pace, it would take a total of 11 frames to complete one animation cycle. The formula for calculating the
number of frames is as follows:
Height of image (in pixels) / Number of pixels moved per frame = Number of frames needed
- OR -
110 Pixels high / 10 Pixels moved per frame = 11 Frames needed
What happens if you don't come out with an even number of frames? You'll either have to select a different number for the amount of
pixels moved by each frame (try 11, 12, 15, etc.),
OR try adjusting the number of pixels moved in a couple of your frames until you get an even number of frames (for example: have most of them move 10 pixels, but make one or two of them move 11 or 12 pixels)
OR you'll need to recreate your background. The choice is up to you.
I've concluded that I need 11 frames for mine.
Step 2:Duplicate the background layer.
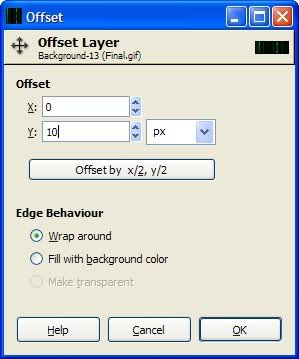
Step 3:Offset the duplicate layer...Ctrl+Shift+O (or Layer Menu > Transform > Offset). When the Offset dialog window opens, enter the number
of pixels the frame needs to move in the Y value box as shown below. I decided, as described in Step 1, that each frame would move 10
pixels. So, I enter 10 as my Y value. Keep the Edge Behaviour set to Wrap Around.
 Step 4:
Duplicate the layer you just transformed and Repeat Step 3.
Step 5:Continue Repeating Step 4 until you have the required number of frames. In my case, I need 11 frames.
Step 6:Once you have the correct number of frames, check out your animation.
Filters Menu > Animation > Playback
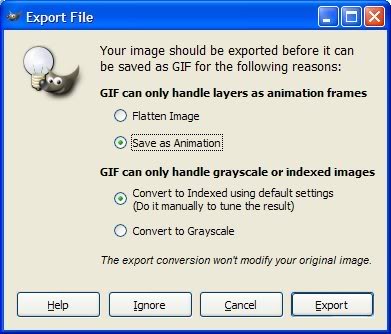
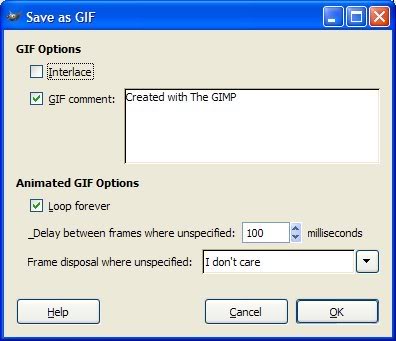
Does it seamlessly animate? If not, redo the tutorial and see if you can figure out where you made a mistake. If the animation works well, save your animation with the .gif extension and use the following settings as they appear.


Again, your image should resemble something like this:

Well, how did you do? I hope you enjoyed this tutorial and learned a new trick or two. As always, questions and comments are welcome.
Happy GIMPing!
Art