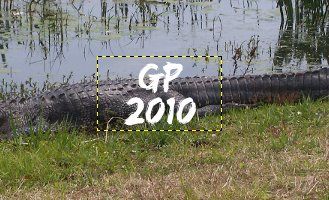
Here are my test results I´d like to receive some feedback to: Placing the unzipped and to "Watermark.pat" renamed pattern you sent me into the Patterns folder did not quit GIMPs notification of "Error while calling >>gimp-pattern-get-pixels<<. Pattern 'Watermark' not found". I then used another pattern I had created previously (not sure how it got stored even though it doesn´t appear in the "Patterns"-folder) to mark the transparent layer with the bucket fill, adjusted the opacity of the hidden watermark from GIMPs panel and saved the image. Next step: The bump map. I somehow can´t get that to work. Upon playing with the options in the watermarking panel and applying your provided pattern (the one with the small circles?) I can´t find the watermarked image on the desktop. Then again, that might be because I´m using your script on my MAC right now... 
Please correct me on the mentioned steps above in order to be able to fully test the script. If there´s anything else I can do for ya, let me know!
Ok, I accidently named the pattern I uploaded incorrectly. I've attached a renamed version to this post. Hopefully that will correct the problem.
I'm not sure if I understand all the steps you took, but when you say you adjusted the opacity of the "hidden" watermark from GIMP's panel and saved the image, I don't follow. At this point, there is no hidden watermark in the script. My suggestion was for you to be able to see how the pattern worked with the bump map settings because I've decided against incorporating a mechanism for previewing.
When you put the pattern in your patterns folder, you need to add the pattern to a transparent layer. The pattern will be used to bump map the image. If you want to see what the bump will look like, you need to make the image layer (not the pattern layer) active and then run the bump map filter. In the "Bump Map" drop down, pick the layer that contains the pattern. Depending on where the layer is located with regard to the image, you may have to move the preview window sliders around to see it. Then, experiment with the settings til you get something you like. Write down those values. Next, run the script and when the script dialog appears, plug the values you wrote down into the script and choose OK. You need to point the script to the folder containing the image(s) you want to experiment with as well as the folder where they will be saved.
If you don't want to see what the bump map settings look like, then don't follow the instructions above. Just put the watermark pattern in your patterns folder, run the script using all the defaults (with the exception of the folder locations/file names) and when the script is finished running, open the folder where you told the script to save the images and see if the watermark was applied.
Not sure if I'm helping at this point.
Posted on: March 23, 2010, 03:35:51 PM
Here's some images to assist with what I'm getting at>
Starting Image:
Look in the pattern dialog and note the size of the pattern. In this case it's 125X75
Add a new transparent layer to the starting image with the same dimensions as the pattern:
Here's what the starting image layer dialog now looks like:
The new layer is positioned here on the image:

But I moved it to the center like so:

Now, go back to your pattern dialog, click on the watermark and drag the pattern to your image window to fill your new layer:

Make your image layer active (highlighted in blue)
Open the bump map filter and move the preview window sliders until you can see the pattern and experiment with the settings until you get something you like.
When you get the settings you want to use, write them down. These steps are only for you to see how the pattern will affect the image. Now, run the script, replace the default script values with those you wrote down, and run the script on the folder of images you wish to watermark.
Let me know if I need to provide further clarification.
Art