In this tutorial, I will show you how to create text (or any other thing you might choose) that looks as if it's being written by hand. This way is so easy, I can't believe I didn't think of it before.

Let's start the tutorial!
Step 1:A) Open GIMP and add a background. I just picked a blue color. Anything will. You can even use one of your unfinished sigs or avatars.
B) Add new image and add some text. I'm using the "Asenine" font, which you can get at dafont
Click Me!C) Right-click on the text layer and choose "Alpha to Selection"

Your image should now look something like this:
 The red outline represents the selection area. Your selection area will look like it's surrounded by "marching ants."
D) Now, with the selection still there make the background image active.

You'll notice that my image only has one layer now. Yours probably has 2 (background and text). I've already deleted my text layer. You can either delete it now or keep it there and turn it off (Click "eye" button next to it). If you're afraid you might make a mistake, just leave it there. Ultimately, you'll need to delete the layer. If you delete your text layer now, you may want to save the selection as a channel (Select > Save to Channel) just in case you inadvertently delete the selection. That way you can go to the Channels tab and recall the selection.
Step 2:A) Set your foreground color to any color you want. This will be what your final color will look like.
B) Grab a brush. I'm using a standard GIMP Circle 15 X15 brush. Font size will dictate your choice here. You may have to periodically adjust your brush size to accomodate width changes, bends, proximity to adjacent letters, etc.
C) With the selection still activated, add a dab of color with your brush by clicking in the first letter wherever you would normally begin writing.

D) Click on the Duplicate layer button

at the bottom of the Layer Dialog Window to make a duplicate of the layer you just added your first bit of color to.
E) Repeat Step 2B - 2D until you have covered your entire bit of text.
If you make any mistakes (like overlapping areas you didn't mean to), use your eraser tool to fix those spots. You may need to adjust the brush sizes accordingly.Here are two images showing mine partway and the final non-animated result:

 Step 3:
 A)
Delete your text layerB) Play your animation to see if you missed any spots (Filters > Animation > Playback)
If everything looks good, save it. You're finished!
Step 4:A) File > Save or File > Save as....
B) Assign a name with the gif extension (ie....animation.gif)
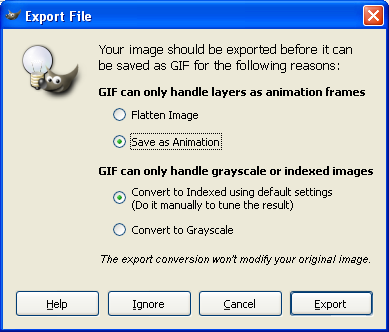
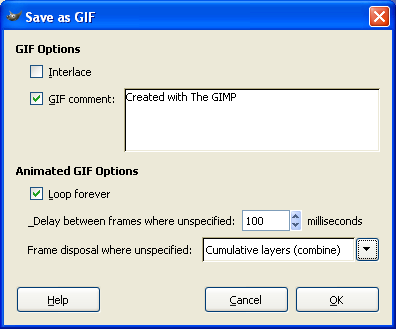
The following windows will open. Change the setting as follows:

 I've chosen the speed of 100ms (1/10th of a sec). You can adjust yours as you see fit. The higher the number, the slower the movement between frames.
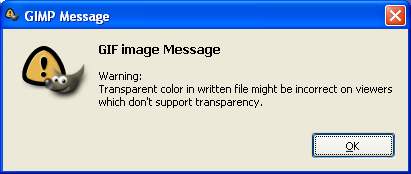
If you get this error message, just click OK.

Here's the final product:

Later on, I'll present Method #2. Enjoy!
Art